Yes, yes, “where have you been?”, I hear you cry. Well, what with getting issue 10 out the door and having the usual seasonal commitments, it’s been a while since I’ve been able to find the peace and seclusion to wield a paintbrush in anger, but here I am, raring to go.
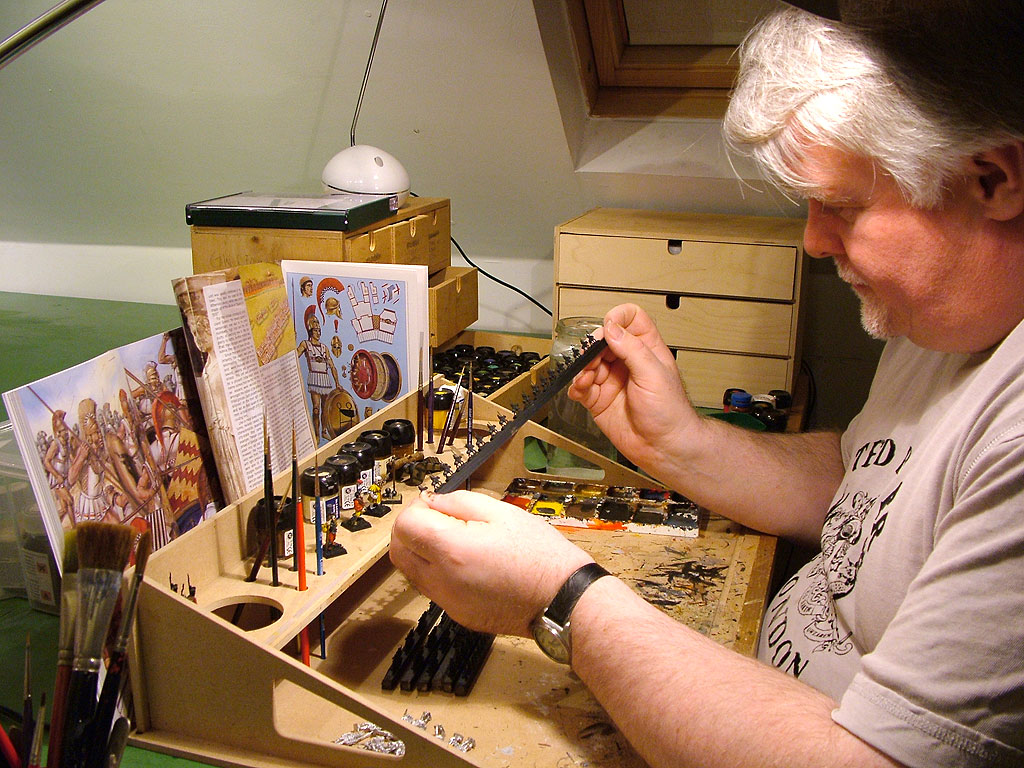 You may recall that I had undertaken the basic prepping of my Baccus 6mm Greeks, and the time had come to start bringing these diminutive little critters to life. The interlude had also given me the opportunity to take some advice on tackling microscopic miniatures, as a result of which I was certain that the black undercoat method was the way to go. The first picture, therefore, shows me at my painting desk examining the results of a spray of Games Workshop Chaos Black, followed by a dilute wash of the same colour from the pot with a brush. The reason for this is that I almost invariably find that no matter how thoroughly I think I’ve sprayed, it seems that within 24 hours I spot little chinks of bare metal that inexplicably seem to have escaped coverage. As a matter of course, therefore, I go over with quick brushstrokes loaded with a thinnish wash of the same colour.
 The next stage was to apply a drybrush of mid-tone grey to bring out the detail on the castings, in order to give my fuzzy eyes a better chance of seeing where subsequent paint should be applied! Pure black has a way of making me go cross-eyed when I’m focusing on the tip of a small brush, so this is a variation of the suggestion made a while ago by Tyler Provick. I loaded my large-ish soft brush with Citadel Codex Grey, wiped most of it off on some kitchen towel, and applied lightly in broad side-to-side sweeps as shown here. this is also where mounting the figures on strips of wood really comes into its own!
 The next shot shows you a close-up of the effect achieved. You can see how the raised detail suddenly leaps out in relief and the areas to be left as shadow are easy to identify.
 I always like to work from the inside out, as it were, starting with the flesh tones. So, once the grey had dried (which really didn’t take very long under the anglepoise lamps that I use – the first strip was dry before I finished the last one), I loaded my brush with Citadel Dwarf Flesh, diluted about 50/50 with water. I did wonder about going straight to the paler Elf Flesh, but I want my chaps to have that suntanned, Mediterranean look, so I’m happy to start with the slightly darker tone, adding a highlight if I think it necessary later.
 Already at this stage, I had Pete (owner of Baccus) Berry’s advice ringing in my ears: “At this scale, paint the unit, not the man.” My eyesight’s pretty good, but even with a small brush, it’s virtually impossible not to get paint on areas other than those you are aiming for. The grey drybrush definitely helped, though, making it far easier to identify what should be arms, legs, bits of equipment and so on. So, on went the paint, and before I knew it, I was sploshing the last bit of flesh on the last of the archers. Here’s a close-up on the result: hardly the neatest paint job I’ve ever done at this stage, but of course the effect will be cleaned up as each subsequent colour is added. A good time to take a break. This whole stage took probably no more than an hour and a bit, and that was with tea breaks!
Next time, I’ll concentrate on the clothing elements of the miniatures, before adding equipment and armour, so those Ospreys you can see around the painting table will come into their own.
Hi Henry,
thank you for this articles. It’s a great help for me. Now, I can paint some 6 mm. 😉
Henry – very good to see you back (blogging) again.. also good to see the Greeks continue to make their advance to the wargame table.
The black undercoat with white “dampbrush” approach is one I’ve used for some years now, probably since the days of the old Rec.Games.Miniatures.Historicals usenet group (see http://tinyurl.com/2pkvot for some of the anorak discussions we used to have on the subject..can’t believe this was seven years ago!)
It suits my style really well, using the white dampbrush (rather than grey) also allows me to make more use of the Vallejo inks rather than paints, they’re much easier to make go where you want – and the black covers up an ink better than a paint when you go ‘over the lines’
I’m not a good painter, in fact I use Pete Berry’s advice no matter what scale I paint at! 😀
Great pictures, Henry. And it’s good to see the technique so detailed. I have found that lots of light helps me see figures better when I am painting. I have had a gooseneck lamp on my desk that I can adjust over the figure(s) I am painting so I can see the details better. And then I make the mistake of taking pictures of them with a high quality digital camera and see how lacking the paint jobs truly are! 😉